That time I got fed up with Jamboard during physics lessons and made my own multiplayer drawing app
The most isekai-sounding title on this website.
Back in 2019, I was starting high school. I had a particularly strict and scary physics teacher, whose explanations had a hard time getting into my head.
So my mom found me a private teacher, whom I would visit every week for 1-on-1 tutoring. At first I would visit her in person, but then COVID-19 happened. Everyone got locked down in their homes, so we had to find a remote solution.
As a replacement, we started hopping onto Skype. At first, she would share her screen with MS Paint, and scribble with a drawing tablet attached to her computer. But soon, presumably from her experience at school, she found out about Google Jamboard. We switched to it as a more engaging alternative.
Except, it was a nightmare.
Her laptop couldn’t put up with it. She often complained that “her pen had inertia.” Judging by the janky movements of her cursor, I predicted the app being terribly laggy on her side.
I knew there was no reason for it to be that slow. It’s just a darn pixel canvas synchronising cursor events.
Jamboard’s page size was also very limiting. You had 20 A4-esque pages available, which was fine for a single session, but very limiting for longer-term notetaking.
Naturally, there were alternatives available online. I just didn’t wanna look for them, because I was a proud 17-year-old programmer. I wanted to make something better.
It was the 2nd of February, 2021.
I made the first commit.
NetCanv was born.
Overview
Before I go any further, I’d like to set the stage by showing you how the app looks currently. I’ve long since stepped down from maintaining it, but not much has changed in the interface since.
You can download a build from GitHub to play around with it yourself. It does almost nothing on the server side, so don’t worry too hard about Slashdotting it.
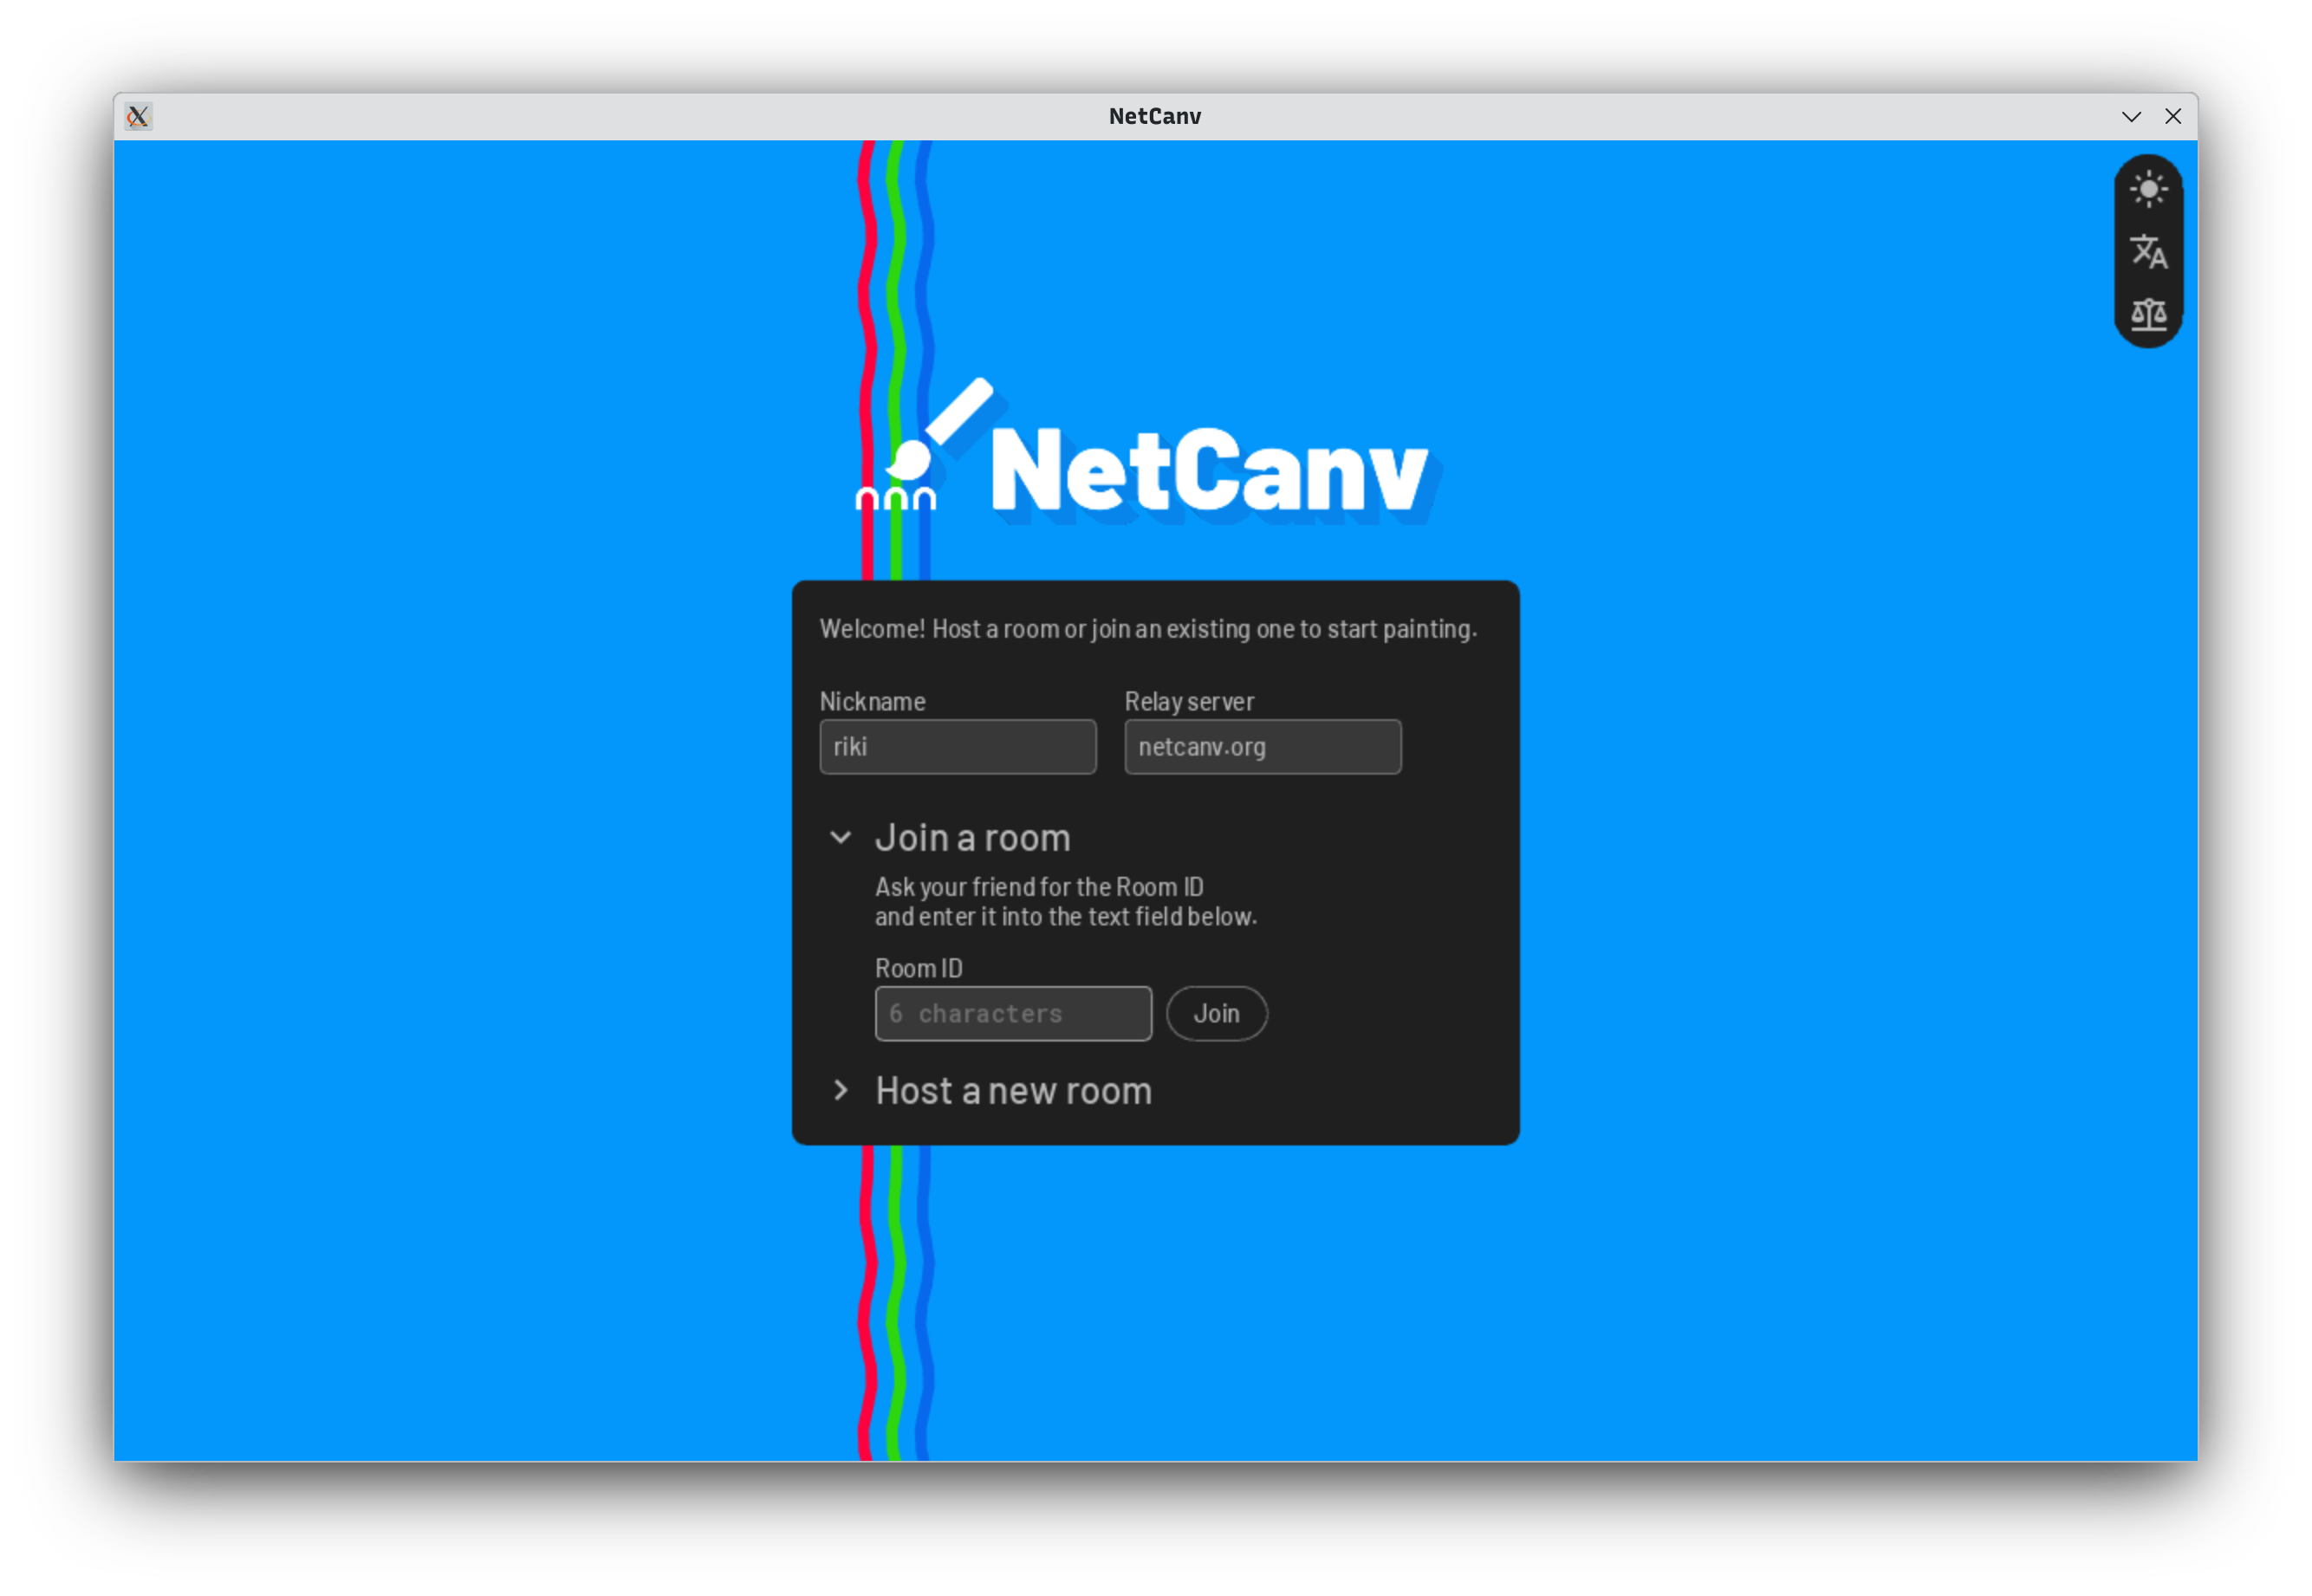
When you first open NetCanv, you’re greeted with a start screen telling you to input your nickname, the server you’d like to join, and a Room ID. If you’d like to start a session with your friends, you have to host a room, which gives you a 6-character Room ID you can send out to other people.
Once you’re in a room, you can start drawing.
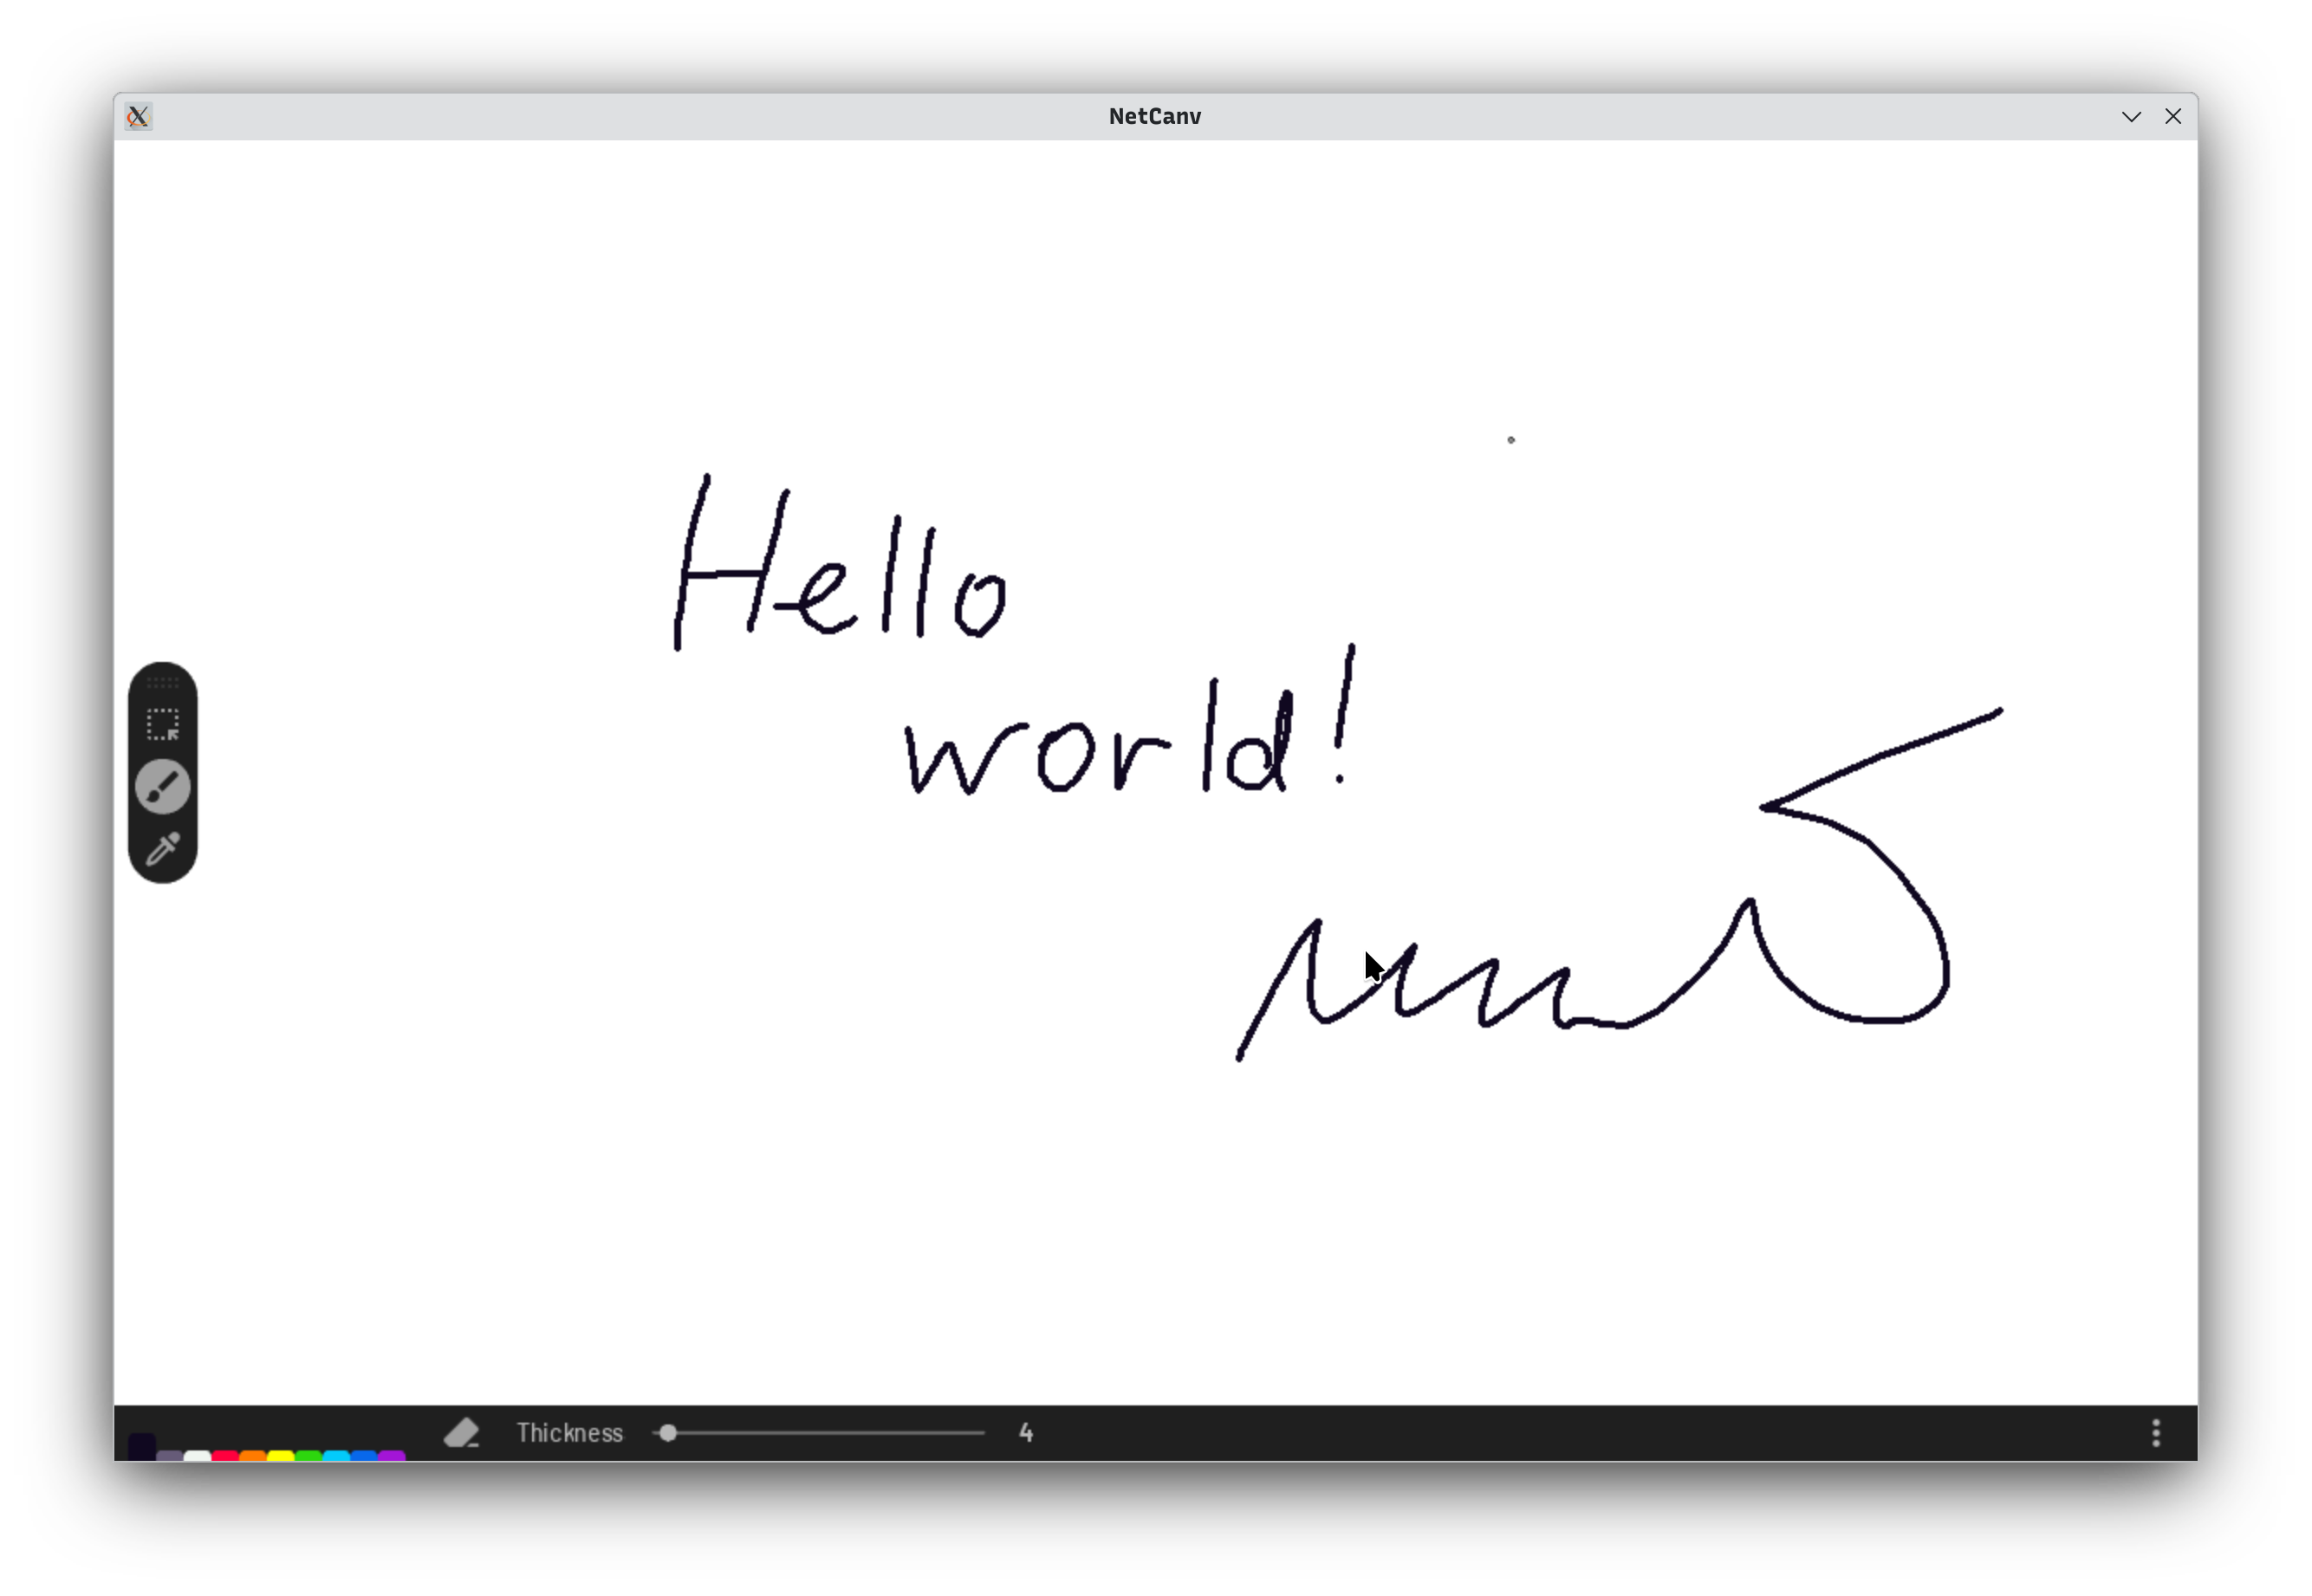
As for the drawing tools: there’s a brush tool, a selection tool, a colour picker, an eraser, a fairly advanced colour palette, and that’s it. You can also copy and paste images from the outside world into the app, and vice versa.
My last release of NetCanv was on 2022-03-10. I’d worked on this app for about a year until I got bored and started thinking about other projects.
This post is a story of what went into the app, as well as some tidbits on how it is architected. Enjoy!
Beginning
Once my brain reached its breaking point of starting a new project, I knew I wanted this to be something more than just an app. I decided to make a YouTube tutorial / development log series out of it.
The plan was to have four episodes:
- Windowing, drawing on the screen
- UI, pixel canvas
- App state machine, making the pixel canvas infinite
- Peer-to-peer networking
(I’m not linking to them here, because (a) they are in Polish, and (b) I’m not particularly fond of my narration from back then.)
I released the first three, and it was time to do networking—something I had never done before.
It took much longer than I had originally expected. I had to drop the original plan of using peer-to-peer networking with hole punching, because it ended up being too complicated for me to understand back then. Instead, I ended up implementing the networking based on TCP streams being relayed through an intermediary server.
Through the networking-related frustrations, my motivation for making videos waned.
Besides, I had a working app, and my friends were enjoying it. There was little point in doing any more videos, when I could just release a new version, tell them to hop onto it, and they’d enjoy it just as much if not more than a one-time YouTube video.
So I abandoned the YouTube series. It still sits there on my channel, canned forever, at 3 out of 4 episodes.
A wild competitor appears
Except it is never that simple, is it. There was one more factor that made me drop doing videos and focus on developing the app itself. And that was a competitor.
Though starting the project was spurred by my frustrations with Jamboard, the idea for NetCanv was actually stolen from an old program my friend Aleksander wrote, called MultiPixel.
It was the same exact idea: a drawing board that you joined together with friends, and could draw stuff on. Except MultiPixel was a very old program of his, back from his times learning to program. There was no way to get it working, because the original source code had been long lost to time. Another friend was keeping a client executable, but nobody had a working server, so it basically was just a digital paperweight.
I was hoping that with NetCanv, I could create something similar. A little canvas that would bring people from our community together, except I wanted to improve on the original by making it infinite. ∞
When Aleksander heard the news, he decided he was gonna do a revival of MultiPixel. This time persistent, in the browser, and with an infinite canvas. 1000x technologically cooler than that shoddy prototype from years ago.
And that, my dears, was my competitor on the horizon.
I’ll say that friendly competition between the two of us was the coolest, wildest thing in the world.
It was a fight to the death over who can win the most friends online in a room at once. It was a matter of creating the best multiplayer painting app, and swaying our whole community over to it.
![]()
This is what MultiPixel looks like today.
It’s got plenty of drawing tools.
Ultimately, I think MultiPixel won the battle. It had a browser version, a flood fill tool, and an undo feature, and that was enough to make the drawing experience miles better than what NetCanv could ever hope to offer.
The one thing NetCanv was better at was performance, being a native app written in OpenGL, with client-side, GPU-powered rendering of brushes. But raw performance is never nearly enough to win people over.
NetCanv may have been fast, but it was not a good drawing program.
Another thing that helped was the culture around MultiPixel. It had persistent rooms, and Aleksander purposefully designed it to encourage drawing art with its set of carefully chosen tools.
Not only that, but he himself drew a whole bunch of art in our main room, making it clear that this was a meeting place for drawing cool things, and not pasting images of anime girls with huge boobs (which is what became of NetCanv after one of my friends made a fork that enabled image pasting before I had it in the mainline version.)
And thus, MultiPixel won.
…Or did it?
There is one aspect of MultiPixel which has been a point of controversy since the beginning, and it’s that it wasn’t initially open source.
NetCanv was open source from the very start, and the tinkerer minds in our friends group quickly hopped onto its source code and started hacking on it. There was one friend who contributed a bunch directly to mainline, and another who forked the code and started adding additional features onto the app.
So what ended up happening was that MultiPixel was the crowd favourite for doing art, and NetCanv became the crowd favourite for extending and hacking upon.
I guess you could say we both won in the end.
And I think that’s awesome.
Contributions
I’d like to take a moment to thank my friends who participated in NetCanv’s development by directly contributing patches.
-
devildefu, who contributed major refactors to help support building the app to WebAssembly and improve the user experience. The current maintainer after I stepped down from the project.
I never managed to carry the WebAssembly work into mainline, but it was awesome seeing the app run in the browser, bit by bit.
-
firstbober, who contributed an AppImage build, a dark theme (visible in this posts’ screenshots!), and significantly improved our UI framework’s implementation of text boxes.
Also responsible for contributing a lot towards stress testing the app, hosting our largest NetCanv canvas on a custom headless server.
-
ezioleq, who contributed various smaller fixes.
And of course, a huge thank you to everyone who participated in testing and pushing the app to its limits.
Inside NetCanv
Now that you know the backstory, I’d like to dedicate the following section to the inner workings of the app.
From the very beginning, NetCanv was meant to be really lightweight and fast on all axes. From being GPU-powered, to having a really efficient network protocol.
I didn’t want to use a web browser for this task, because back then I’d believed web apps were necessarily bloated and slow, with high memory usage. (Which is not really the case, but that’s 17-year-old me logic for you.)
So I set out to write a native app in Rust, in a custom, immediate mode UI framework, powered by Skia. Talk about bloated.
UI
Initially, rendering was handled by Skia, but I later rewrote it to OpenGL ES, to make it portable to WebAssembly.
The layout is done in an immediate mode fashion. It is recalculated each frame based on a model of nesting rectangles. Content is rendered on top of the rectangles, and input is processed according to those rectangles’ positions, to make up widgets such as buttons or text boxes.
Here is an interactive visualisation of how the immediate-mode layout system works.
Stack
Rectangle
Drawing
You'll have to enable JavaScript to play with this example.
Try the following sequence of instructions:
- Fill
- Pad
- Push Horizontal
- Push Horizontal
- Fill
- Pop
- Space
- Push Horizontal
- Fill
- Pop
- Pop
That’s how you lay out two rectangles next to each other.
At any given moment, there is a stack of active rectangles. Each rectangle has either a horizontal or a vertical layout (→ or ↓ in the visualisation), which determines the direction in which elements are laid out inside it.
The position at which elements are placed is determined by a cursor (indicated by a dot in the visualisation), which is a point relative to the rectangle’s top-left corner. This cursor advances in the rectangle’s direction whenever a child rectangle is popped off the stack, which is what enables laying out elements next to each other.
A notable thing is that the cursor can go outside the current rectangle’s bounds, and the rectangle’s bounds can be expanded later (the Fit button). This sounds like it would be incredibly useful, but in practice it rarely is. Since there’s no way to draw a background behind what was already drawn, it is limited to drawing overlays on top of existing content.
NetCanv’s toolbars use buttons without a background—the hover state is drawn as an overlay over existing content, which makes it usable in that situation, but not much more beyond that.
Extra state for widgets that need it is kept explicitly by the user of the UI, and does not live inside the UI library (like it does in Dear ImGui).
Here’s a skeleton of how you would build a UI using NetCanv’s framework.
// This is a struct representing the app's state.
// States represent different "screens".
// - The joining/hosting state is called "lobby".
// - The painting state is called "paint".
struct State {
	assets: Box<Assets>,

	nickname_field: TextField,
	relay_field: TextField,
}

impl State {
	// Assets contains shared data, such as fonts or translation strings.
	// This example omits translations for simplicity, though.
	pub fn new(assets: Box<Assets>) -> Self {
		Self {
			assets,

			// This is where we initialise the widgets' states.
			// We'll give the input fields some default values.
			nickname_field: TextField::new(Some("Anonymous".into())),
			relay_field: TextField::new(Some("netcanv.org".into())),
		}
	}
}

impl AppState for State {
	pub fn process(
		&mut self,
		StateArgs {
			ui,
			input,
			..
		}: StateArgs
	) {
		// Widgets typically do styling through "args structs".
		// Here we can modify the text field's font, size, colours, etc.
		let text_field = TextFieldArgs {
			font: &self.assets.sans,
			width: 160.0,
			colors: &self.assets.colors.text_field,
			hint: None,
		};

        // If you played around with the example above, you should find the
        // push(), space(), and pop() operations familiar.
        // TextField::with_label makes use of them internally, which is how it
        // ends up interacting with the rest of the layout.
		ui.push(
			(ui.width(), TextField::labelled_height(text_field.font)),
			Layout::Horizontal,
		);
		self.nickname_field.with_label(
			ui,
			input,
			&self.assets.sans, // font
			"Nickname", // label
			textfield, // args
		);
		ui.space(16.0);
		self.relay_field.with_label(
			ui,
			input,
			&self.assets.sans, // font
			"Relay server", // label
			textfield, // args
		);
		ui.pop();
	}

	fn next_state(self: Box<Self>, renderer: &mut Backend) -> Box<dyn AppState> {
		// This function is called after process() and can return a new state
		// to transition to, or `self` if no transition is to be made.
		self
	}
}
Verbose, yeah. But I will admit, it is a pretty simple UI framework internally.
In reality though, it proved to be rather limiting. There are certain places where you have to know the size of a widget ahead of time to lay things out correctly—including centering things on the screen—and this framework simply doesn’t have that. It can’t have that, because it is drawing things as they’re being laid out.
That’s the biggest limitation of immediate mode UI, and proved to be a big pain in the ass in reality. Centering, or even laying things out from right to left, are very useful things to have in a UI framework, yet we couldn’t have them due to how limited this model is.
You might be wondering then, how is the dialogue centred in the lobby screen?
This is where the horrible hack known as views comes in.
In addition to laying things out the standard way, NetCanv also has a concept of “views”, which are like separate windows layout can jump to, that are unconstrained by the basic push / pop layout system.
This is how the layout for the main lobby screen is done.
let padded_root_view = view::layout::padded(&root_view, 8.0);
view::layout::align(
	&root_view,
	&mut self.main_view,  // the panel in the centre
	(AlignH::Center, AlignV::Middle),
);
view::layout::align(
	&padded_root_view,
	&mut self.panel_view,  // the panel in the top right
	(AlignH::Right, AlignV::Top),
);
But, that still does not solve the issue of computing the width and height of the panels. So, lo and behold, the solution:
main_view: View::new((
	Self::VIEW_BOX_WIDTH,
	Self::BANNER_HEIGHT + Self::VIEW_BOX_HEIGHT + Self::STATUS_HEIGHT,
)),
panel_view: View::new((40.0, 4.0 + 3.0 * 36.0)),
I just calculate it manually. 
There’s loads of other problems with this UI framework, though those mostly stem from just not ever being done rather than being fundamental deficiencies.
While writing NetCanv, I didn’t have a HiDPI screen on me, so the app naturally doesn’t support HiDPI. This is why the screenshots are so horribly blurry—I now have a 4k display at home, and had to fiddle with running the app through Xwayland, as well as making KDE do the scaling by itself.
Remember that NetCanv was made before I had a job though. I just couldn’t afford that sort of hardware!
There’s also a lack of screen reading support. (Though whether that’s useful in a painting app is debatable.)
What I would do differently next time with the overall basic framework, is to decouple the layout step from the rendering step. Layout really ought to be done separately, if you want a UI framework that’s internally simple, as well as easy to use. How I would do that in Rust, I’m not sure.
I chose the immediate mode paradigm mainly because it lent itself well to the borrow checker—and I think it was a good choice for that reason—but frankly its limitations were a bit frustrating at times.
Of course one could debate the borrow checker’s helpfulness in this situation, but I don’t want to get into it.
Canvas
NetCanv has an infinite drawing canvas. You can pan your camera however much you’d like, and you will never hit any boundaries (other than float precision, maybe).
This choice was made primarily due to frustrations with Jamboard’s A4-like paper size. I think an infinite canvas lends itself pretty well towards note taking, as you never have to worry about running out of space. You can just keep on drawing, and the canvas will extend itself.
Most infinite canvas whiteboards I’ve used online are object-based, rather than image-based—e.g. Figma and Miro. And I think that kind of sucks!
-
Raster images are very intuitive. They act very much like a piece of paper. You can scribble on them, and then erase those scribbles intuitively. You can use different blending modes, and they will act quite naturally—making it possible to model different kinds of tools, such as highlighter pens.
-
Raster images are forgiving. It’s easy to misalign things in a vector-based tool, and then editing the Bézier curve to work just right is very fiddly—especially if the error happens inbetween control points. In a raster-based tool, sploosh a couple pixels onto the mistake, and you’re done.
-
Raster images are widely supported. Cameras take raster pictures. You can take a screenshot to get a raster image. You can paste a raster image into Discord.
Compare this to those object-based tools (Miro and Figma). While it may be a nice novelty that you can take a stroke of the pen and move it around, scale it, and rotate it, I found it to get in the way much too often when doing scribbles. The pens in those tools are also quite primitive, without so much as even an eraser.
Combine this with the proprietary nature of those tools. You can’t just copy objects from your whiteboard and paste them into a chat room.
Thus, a raster canvas felt like a no-brainer to me. It’s simple, intuitive, forgiving, and widely supported.
To represent a potentially infinite pixel canvas, the image is split into 256×256px chunks. Chunks are created on-demand whenever someone tries painting over them. This requires knowing the precise bounding box of the stroke, but one’s not difficult to find in practice (min and max the stroke’s X and Y coordinates.)

Pictured above is a rough sketch of how the system works. The pink part of the stroke is the part that was drawn in the current frame. Its bounding box is computed, and then extended to span all chunks around itself.
In the current implementation of the renderer (OpenGL-based), each chunk has its own texture. This poses a significant performance problem due to a large number of draw calls that has to be issued to the GPU, and I would not recommend doing it that way.
The older Skia renderer used a better strategy: it had a divide between graphics and network chunks, with network chunks still being 256x256, and graphics chunks being made out of 4x4 network chunks, creating a 1024x1024 texture. This reduced the number of draw calls that had to be sent out, and had better performance than the current implementation. I removed it though, because keeping track of all the coordinate systems quickly became really complicated.
Save format
Initially, NetCanv only allowed saving canvases to a single PNG file. This worked fine for small canvases, but PNG has a fairly small size limit that was easy to hit. Therefore, I had to devise a better solution.
The solution I came up with is extremely simple. In fact, you could hardly even call it a file format. It is not even a save file.
Canvases are saved to a set of PNG files inside a folder, named x,y.png, where x,y are the coordinates of a chunk.
Next to those PNG files is a file named canvas.toml, identifying the folder as a NetCanv canvas.
It only contains a version = 1 key, for identifying versions of the format which had backwards-incompatible breaking changes in them.
This format gives us very good random access, because loading or saving a chunk is as simple as working with a file in a directory.
Canonically, a NetCanv save folder is suffixed with .netcanv in its name, similar to how MacOS .apps are structured.
However, .netcanv folders are nowhere near as neatly integrated with the system as .apps are on MacOS, so the user experience is quite subpar.
A design using a single file would make it easier to manage the canvas in file explorers, or send the canvas to someone through a chat room or email. An SQLite database would actually fit the bill perfectly, and is the format I chose for NetCanv’s successor, rakugaki.
Networking
As I already mentioned, I originally planned to do networking in a peer-to-peer fashion, except I didn’t have enough experience writing network apps to attempt P2P communication yet, so I switched plans and used ordinary TCP streams instead.
However, part of that vision still remained in the final networking architecture. NetCanv’s networking is client-authoritative, which means that clients individually decide on the state of the room, rather than there being a server handling it. Rooms are entirely hosted and kept alive by clients, with the server only being a socket relay for communication within a room.
The client who initially opens the room becomes the room’s host, and is the authoritative source of room contents.
Once another client joins the room, the host sends them over a list of positions of all the chunks present on the canvas. The client can then request those chunks from the host in a separate packet, and the host will encode the chunks to PNG images, or lossy WebP if the PNG ends up being too large, and send them to the client.
If the host leaves the room, the next client who joined after them becomes the host, on the premise that “the next oldest client in the room probably has the most chunks loaded.” This isn’t necessarily true, but I deemed it a good enough approximation.
This allows the server to remain lightweight and easy to set up, but has serious reliability drawbacks. And unreliable, the app is.
Hell
This is the jank section. Brace yourself.
Wayland
A dumb thing Wayland does is that, if your app freezes for too long, the connection to the wayland server will be killed, destroying your window and effectively closing your program.
From what I gather, this is because Wayland has an internal, fixed-size event queue, and all events must be delivered, otherwise the connection is considered corrupt—therefore if at least one event does not manage to get delivered due to an overflow of the queue, the connection must be closed, and your app dies. Source.
I have no idea why Wayland does it that way. It feels like a horrible design decision for robustness. An app should be allowed to continue running, even if it freezes for a minute. Otherwise you get a horrible user experience, where an app that was just chugging along synchronously, for legacy reasons or whatever, dies for no sensible reason. But I’m not involved in the Wayland protocol, so let’s presume this choice was made out of necessity, and not throw too much flame at it.
I initially didn’t offload any of NetCanv’s work to other threads for simplicity. This resulted in an architecture that was not ready for multithreading, lacking necessary synchronisation primitives—not to mention OpenGL forcing you to use the main thread for everything.
I progressively transitioned portions of the app to be asynchronous, but one notable place where the app is still synchronous is saving and loading canvases from the disk.
I don’t remember why, but I couldn’t figure out how to do it asynchronously. Either way the effect is that, on Wayland, if you try to save or load a canvas that is too large, the app will crash due to that stupid event queue filling up.
This is made worse by the fact that NetCanv has an autosave mechanism. On large canvases, this results in the autosave freezing the app for a considerable amount of time, pretty much guaranteeing a crash on Wayland, because autosave can trigger in the middle of you painting—and tablets and gaming mice tend to send lots of events per second.
The autosave only runs on the host, so imagine what happens:
- The host loads a large canvas from disk.
- 60 seconds pass (the autosave interval.)
- An autosave is triggered, blocking the app for a considerable amount of time.
- The user moves their gaming mouse a bit during that block.
Oops. Guess it’s dead.
And then,
- The host role is transferred to someone else, therefore losing some chunks from the session, because the second oldest client commonly doesn’t have the same chunks loaded as the host does.
I love data loss.
Aside: I wonder how the Unreal Editor would fare on Wayland, to be honest. I’m afraid not very well, with its copious amounts of synchronous loads blocking the main thread.
Fearful concurrency
While Rust is renowned for its promises of fearless concurrency, in practice a painting app like NetCanv has several race conditions one needs to be aware of.
Consider this incredibly basic case: we’re in the middle of loading a canvas.
- Client sends a request for chunks to the host.
- Host sends a chunk.
- User paints on that chunk.
- Client receives the chunk from the host.
- The chunk is overwritten.
Oops. Guess your work is gone. Except it isn’t, because the host has received your scribbles, and their version now has your scribbles, too. You’re just not seeing what the host is seeing.
And it’s not as simple as drawing the old chunk below the received chunk, because the brush used by the user may be a more complicated one than just a black circle, opacity 100%, blend mode over.
I had plans to make NetCanv handle this by checksumming the chunks somehow and re-requesting chunks with a checksum mismatch between the host and the other client, but never ended up doing it.
Another place where fearful concurrency strikes, is the selection tool.
When the user pastes a selection, NetCanv will resize it to fit 1024x1024 pixels to prevent DoS attacks, encode it as a PNG (asynchronously), send the encoded data over to other clients, and then those clients will decode the selection data (also asynchronously) and render out the selection reticle on their side.
Whenever the selection is updated, the client will send out a packet containing its updated rectangle (x, y, width, height).
Once the client drops the selection onto the canvas, they will send out a packet notifying others of that.
I don’t think I have to explain too hard how much of a race condition HELL this is. But consider this basic situation:
- Client pastes a very large image. The process of resizing and encoding the image therefore takes very long.
- They move the selection around and drop it.
- Encoding is done, the selection data packet is sent out to others.
Now, the other clients will never receive the selection’s position (because the selection data packet doesn’t include it.)
The packets are also not sequenced in any way, so Yes, the packets received end up being [Data, Drop, Update, Update, ...].
This is simply bad network design. The proper way to design such a tool would be:
- First encode the actions, without sending the visuals. These must always be consistent with what the sending client sees.
- Then add the visual parts to the protocol.
The selection tool conflated those two, resulting in a buggy, racy mess. I never fixed it though, because I stopped working on NetCanv shortly after adding it.
I think that’s about all I wanted to write about NetCanv. A multiplayer painting app was made, lessons have been learned.
If you’re curious, I never got to use it with my physics tutor. I never deemed the app stable enough to be usable in a production setting like that.
The choice of a completely custom tech stack will haunt me till the end of my days. It was fun working on the rendering and everything, but ultimately left us with more of a buggy mess than anything usable.
Not to mention losing out on the social battle, by having extremely ephemeral, unreliable rooms, combined with an inconvenient executable download. My time could’ve been better spent actually competing rather than making the thing barely work.